Twitch
The Twitch extension is available to licensed users only. The feature will not work in demo mode.
A Twitch extension is an interactive add-on that enhances or adds additional content to a Twitch stream. Traditionally, a streamer using djctl would use OBS to superimpose a track information overlay atop their video stream. With the introduction of the djctl Twitch extension, however, streamers can now incorporate a “pop-out” overlay component containing the same real-time track information. This pop-out is independent of the video stream itself and can be dynamically hidden or revealed by the viewer.
See the following video animation for a visual demonstration of the djctl Twitch extension in action.
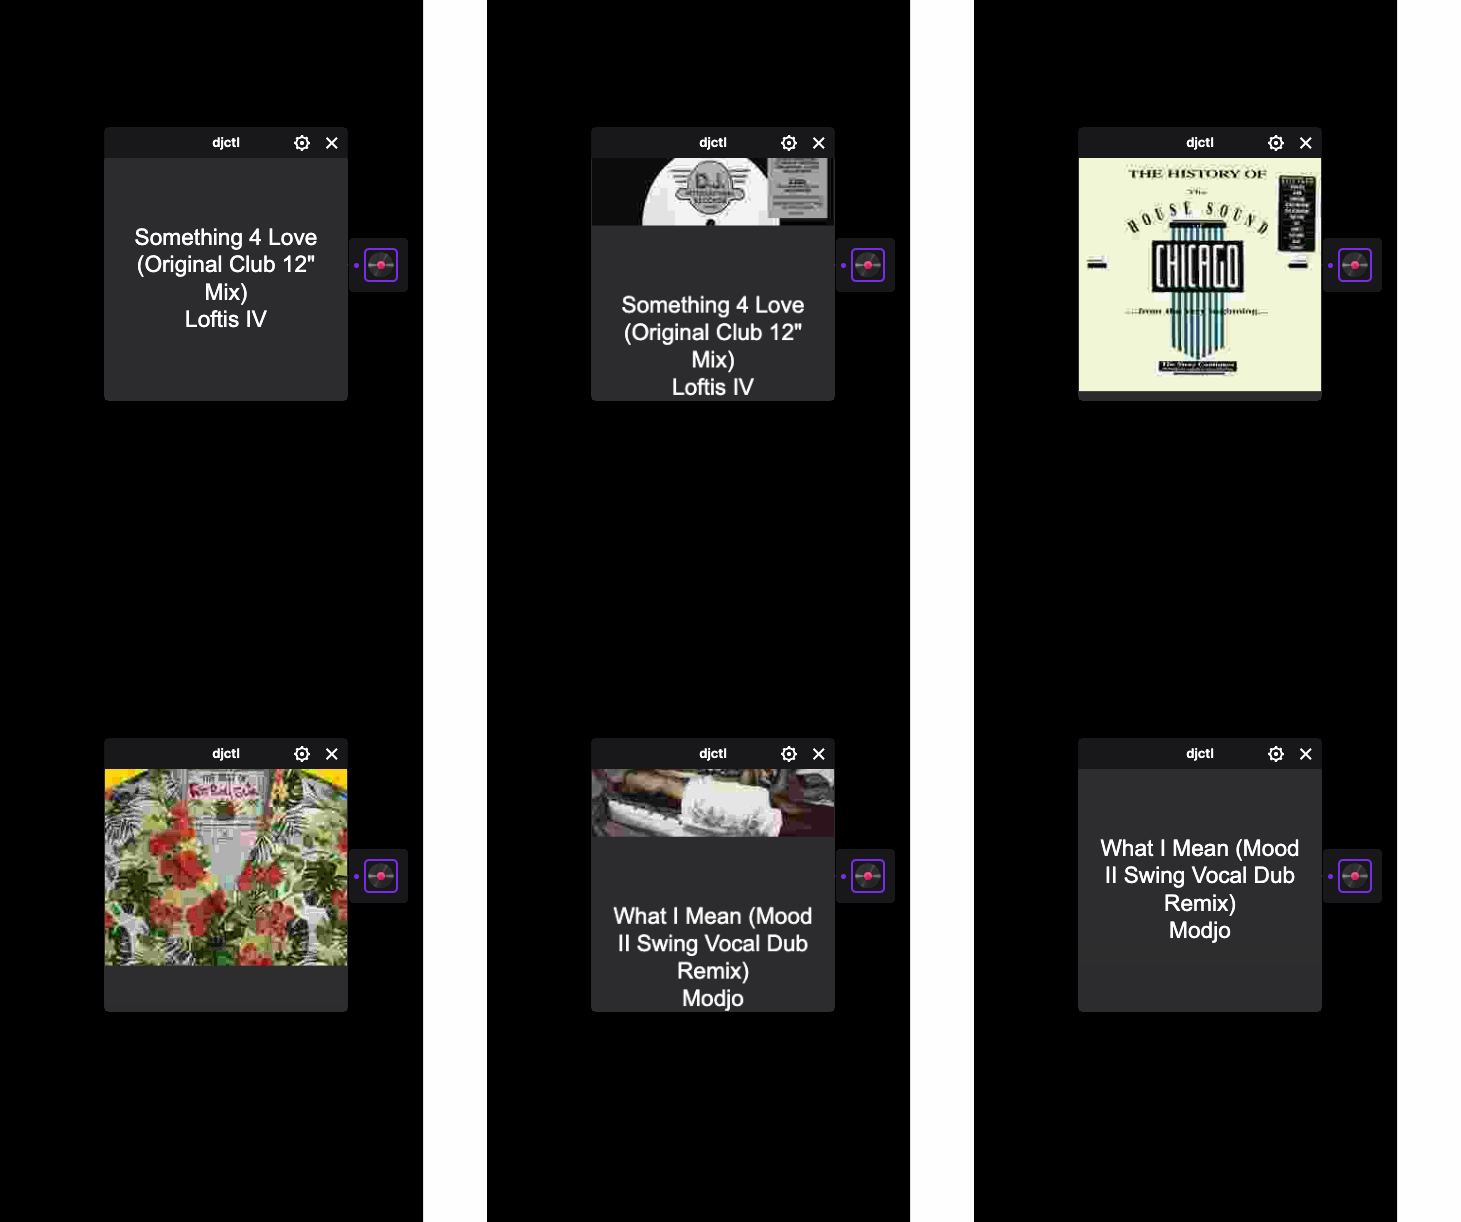
The djctl Twitch extension is supported for both web and mobile viewers.
Authorize djctl
To get started, use the djctl Twitch setup wizard to authorize djctl access.
$ ./djctl twitch setup
time="2025-01-17T11:09:09-08:00" level=info msg="Step 1: Acquire Twitch OAuth token..." _source="command/twitch.go:470"
time="2025-01-17T11:09:09-08:00" level=info msg="Please complete device code flow" _source="command/twitch.go:237" user_code=<REDACTED> verification_uri="https://www.twitch.tv/activate?device-code=<REDACTED>"

Please visit: https://www.twitch.tv/activate?device-code=<REDACTED>
And enter code: <REDACTED>
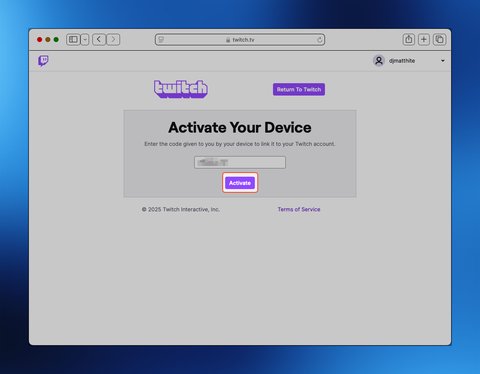
Copy the activation URL into your browser and press ENTER. Once the site loads, click “Activate” to proceed.
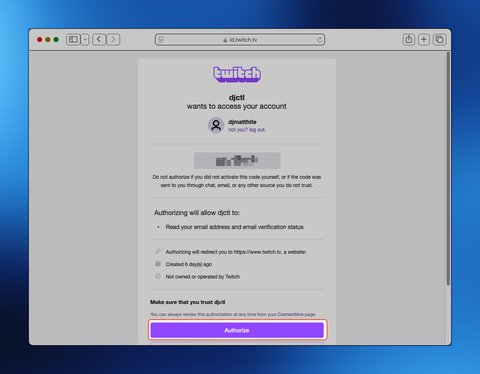
Review the access request. Click “Authorize” to proceed.
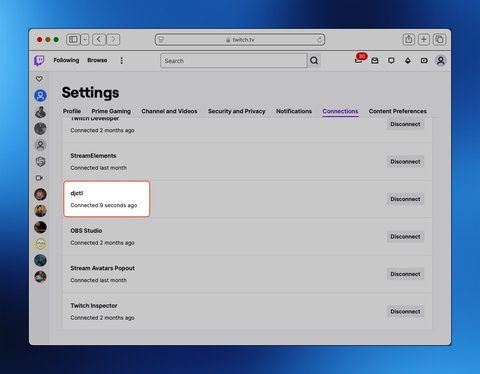
Scroll through the “Connections” section of the “Settings” screen and ensure djctl is present and connected.
Once activated and authorized, djctl will output a Twitch extension API key. Take note of this API key.
time="2025-01-17T11:12:22-08:00" level=info msg="token retrieved" _source="command/twitch.go:475"
time="2025-01-17T11:12:22-08:00" level=info msg="Saved token to disk" _source="command/twitch.go:480" path=.twitch-token.json
time="2025-01-17T11:12:22-08:00" level=info msg="Step 2: Exchange Twitch token for djctl extension API key..." _source="command/twitch.go:483"
time="2025-01-17T11:12:22-08:00" level=info msg="API key retrieved" _source="command/twitch.go:488" apiKey="<REDACTED>"
time="2025-01-17T11:12:22-08:00" level=info msg="API key saved to file" _source="command/twitch.go:493" apiKeyFile=.twitch-extension-api-key.json

Use --twitch.api_key="<REDACTED>" with "djctl start" to send track updates to the Twitch djctl extension.
Treat the Twitch API key as a sensitive credential. Never share it with anyone.
Add API key to configuration
Next, insert this newly generated API key into your djctl conf.yaml configuration file. The following is a simple example of a configuration file containing a Twitch extension API key:
---
license:
  key: "<INSERT YOUR DJCTL LICENSE>"
source: "denon"
delay: 1
target:
  device: "prime4"
  software: "JC11"
twitch:
  api_key: "<INSERT API KEY JUST GENERATED>"
See the djctl CLI usage guide for more information regarding configuration files.
Install Twitch extension
Next, insall the djctl Twitch extension. The extension can be installed via the following URL:
https://dashboard.twitch.tv/extensions/u9wbnrygf06s7l3hb66p41upggylygClick the “Install” button to proceed.
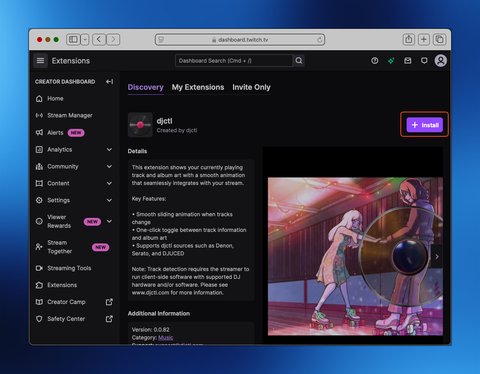
You will then be presented with a “Configure your Extension” screen. This screen contains an area labeled “Track Testing Area” which will contain album art and track information sent from djctl. It will allow you to test connectivity before going live on your stream.
Verify
To verify connectivity, djctl will generate synthetic test data and send it to the extension.
Send test data
Start djctl using the dummy source. This will allow djctl to generate test album art and track information.
./djctl start --source=dummy --conf=conf.yaml
time="2025-01-17T11:34:59-08:00" level=info msg="Starting http listener" _source="start/serve.go:24" httpAddr=":9090"
time="2025-01-17T11:34:59-08:00" level=info msg="Starting dummy source" _source="start/source.go:22"
time="2025-01-17T11:34:59-08:00" level=info msg="track transition detected" _source="start/publish.go:209" artist="" song=""
time="2025-01-17T11:35:04-08:00" level=info msg="track transition detected" _source="start/publish.go:209" artist="Fantastic Musician" song="Creative Ballade Discovering"
time="2025-01-17T11:35:04-08:00" level=info msg="Wrote featured track to websocket" _source="websocket/pool.go:99"
time="2025-01-17T11:35:04-08:00" level=info msg="Wrote featured track to file" _source="file/generic_file.go:104" file=featured.png
time="2025-01-17T11:35:04-08:00" level=info msg="Wrote featured track to file" _source="file/generic_file.go:104" file=featured.txt
time="2025-01-17T11:35:04-08:00" level=info msg="Wrote featured track to OSC socket" _source="osc/osc.go:80"
time="2025-01-17T11:35:04-08:00" level=info msg="Wrote featured track to twitch" _source="twitch/twitch.go:141"
time="2025-01-17T11:35:09-08:00" level=info msg="track transition detected" _source="start/publish.go:209" artist="Amazing Developer" song="Amazing Ballade Listening"
...
Please confirm the test album art and track information appears in the “Configure your Extension” screen in the section labeled “Track Testing Area”. By default, the art and track information will update every 5 seconds.
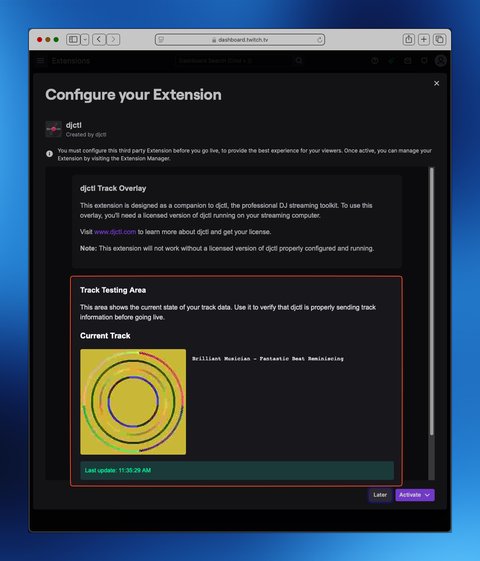
Once connectivity has been verified, it’s time to activate the extension.
Activate
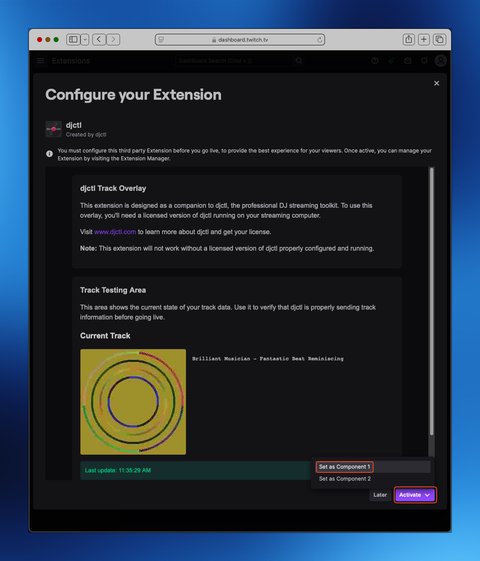
Click the “Activate” button in the lower right hand corner of the extension screen. Choose “Set as Component 1”.
You will see a confirmation that the extension is now active. Click “Done” to proceed.
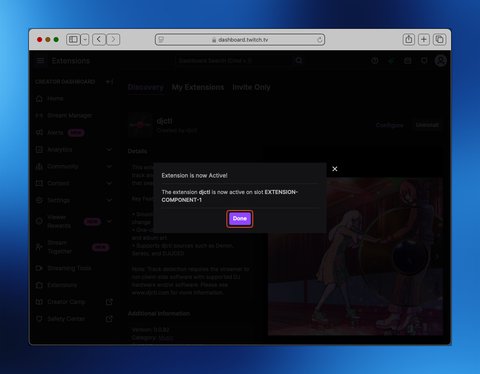
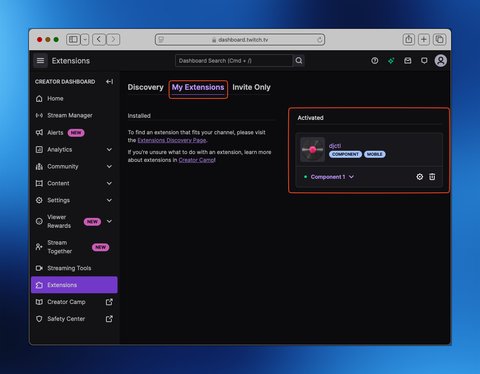
You can confirm your extension is active through the “Creator Dashboard” in the “My Extensions” section. Notice the djctl extension is marked as “Activated” and assigned to “Component 1”.
Go live!
That’s it! Go live as you normally would, launching djctl to monitor your DJ hardware or software.